Wednesday, February 15, 2012

Valentines Day 2012
Red Velvet kicked up a notch!

What's better than a homemade red velvet cake ball or even a red velvet cupcake on it's own? Read on to find out! 

Nothing screams Valentines Day more than the Southern favorite red velvet cake! When my husband requested cake balls for his Valentines Day treat, I knew I had to step it up a notch, specifically when he asked if they could be red velvet cakeballs! My answer, without even thinking about the planning element, was a resounding "Of course I can do that!" 

At the time when I agreed to undertake the baking/making of such red velvet creations I had forgotten (possibly purposely blocked out) the last time I made anything red velvet, and all of the times before that. Unfortunately when making something with red food coloring you have to be so incredibly careful not to get the food coloring everywhere. Unlike other food colors, possibly because of it's potentially sinister appearance, it always somehow makes it out of the bowl and onto something making it look as though an episode of the popular television series Dexter might have been filmed right there in your kitchen! When I say you have to be careful when making red velvet desserts of any kind, I certainly am being truthful. Please consider yourself warned. 

When in the planning stages of making the red velvet cake to later be formed into balls I knew there was only one recipe option to go with and that is the one recipe I have turned to for Red Velvet Cake ever since I first made it a few years ago. It can be found at the following link. You'll notice that I have linked to another bloggers page entitled Smitten Kitchen. I am a huge fan of this blog and follow her posts regularly.

When trying to cut the recipe down to the amount to only make roughly 12 cake balls I finally decided to throw that idea out the window. I chose, as a personal feat and challenge, to create a moist as-can-be red velvet cupcake with cream cheese frosting adorned with a dark chocolate enrobed red velvet cakeball garnished with freshly toasted pecan pieces! I think you'll see below that my challenge was not only successful but tasty and visually appealing as well! 

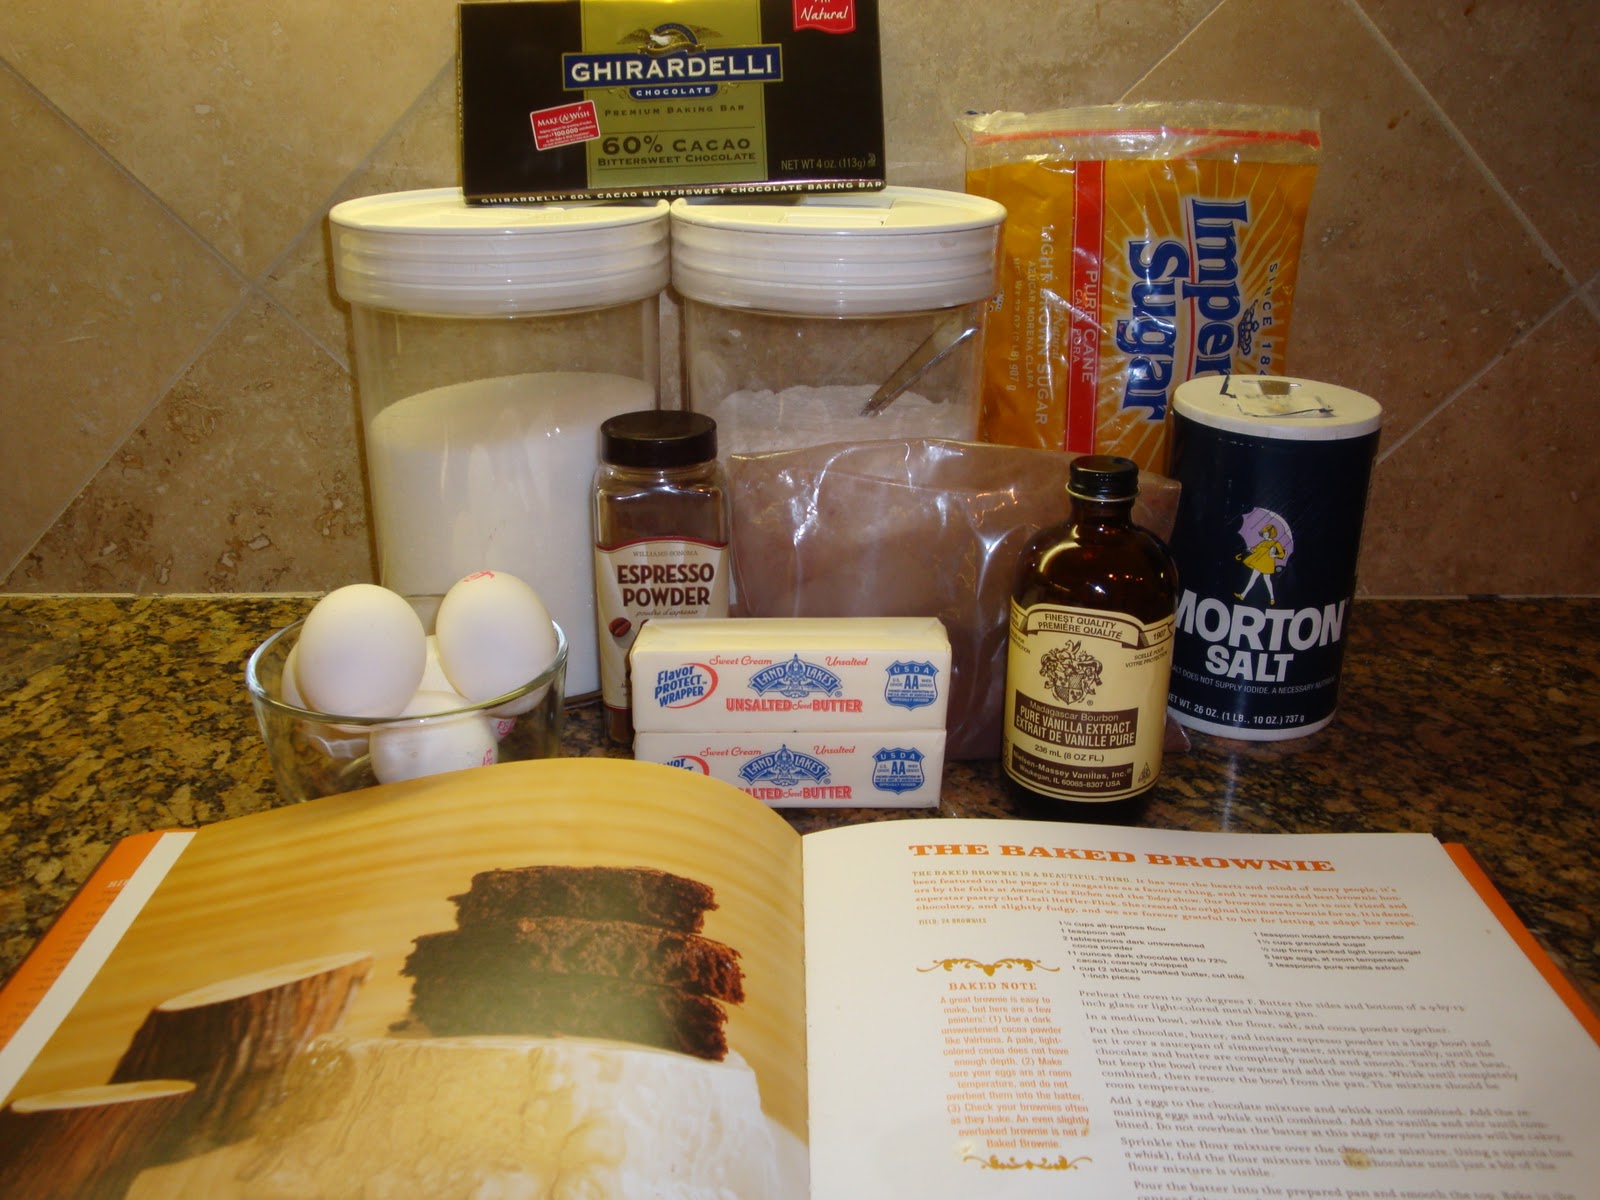
Below is a photo of the ingredients for the cake itself. I went ahead and baked 20 cupcakes and a 9" round cake that was later broken down into cake balls. You will notice that I used a tasteless gel food coloring instead of liquid food coloring. I find that gel food coloring is somewhat easier to manage than liquid. Often times, when using gel food coloring, the red color you get in the cake isn't as deep as if you use liquid. If you're looking for a truer red color, I would suggest using the liquid variety of food coloring. 
Below is a photo of the ingredients for the cream cheese frosting, with the recipe also found at the link above. I chose to double the recipe as I'd rather have too much frosting than not enough! It is truly one of the greatest cream cheese frostings I've ever made because it's not too sweet and has just the right amount of tang so that you know that the cream cheese is in there. Who would think that only four simple ingredients would make such a delicious and easy frosting? You will notice that I had to use a different variety of vanilla extract for the frosting as I sadly ran out of the my favorite Nielsen-Massey when making the cake. 
Cupcakes fresh out of the oven cooling on an oven rack waiting to be frosted. 
Frosted cupcakes! I do so love my new large Wilton tip! If you've never frosted anything with a pastry bag I highly recommend it! Oh and with that I highly recommend the disposable pastry bags for easier cleanup. 
Because I had a lot of cupcakes I took a few to work and received many rave reviews from my co-workers! A couple of them even exclaimed that these particular cupcakes were the most amazing cupcakes they've ever tasted! I decorated them for work as shown below with a simple toasted pecan. 
Finally Here are the formed and refrigerated cakeballs ready to be dipped into the chocolate. 
For coating cakeballs I personally use Merckens Candy Melts which I personally purchase off of Amazon. They are truly, in my opinion, the best and not available for purchase anywhere in Dallas that I know of. 

Below is a photo of a constructed cupcake adorned with a freshly made cakeball. 
Another angle so you can see how pretty they turned out!
I feel it's safe to say that my Valentine was quite pleased with his Valentines Day treat! Below is a photo of a cupcake and cakeball cut in half to show you consistency. So incredibly moist and not too sweet!
The only change that I would make when making these again would be to make the cake balls slightly smaller, but other than that they came out exactly as I expected which was PERFECT! 

Monday, February 6, 2012

Super Bowl Cupcakes!
For Giants Fans ONLY - I kid, I kid!

Well, it's me, coming atcha live from Dallas, Texas. The land of the strangest Winter ever known to man! Last year at this time there was approximately 8 inches of snow/ice on the ground and this year it is significantly warmer. Just the other day the high was 75, oh how I wish I was kidding! I think I'm one of the few native born Texans who actually likes a real winter. I love the East Coast, New York to be more specific, so it's fitting that we are a New York GIANTS household!  When we were invited to a Super Bowl party recently I naturally asked what I could bring!? Happily I accepted the suggestion of my bringing a baked good of some sort! You know me, well at least I hope you REMEMBER me because of my blogging absence, I only bake from scratch!

I wanted to make something New York-ish for the New York Giants fans, including my husband and myself, attending the Super Bowl Party. The colors of the New York Giants were out, I'm not going to mess with fondant, I just think it's gross, and I didn't want to make the usual or dare I say expected, red or even blue velvet cake!

I have a confession to make, I have never made a Cheesecake or more specifically a New York style Cheesecake. I have made Cheesecake bars before but never an actual real-live bonafide Cheesecake using a real live spring form pan! I considered it and I considered it some more, but then decided it was not the time for me to get experimental and try making a Cheesecake from scratch. 

I eventually, after much thought, decided on the Magnolia Bakery Vanilla Cupcake with Chocolate Buttercream. Magnolia Bakery is a pretty famous New York Bakery, so it sort of goes along with the theme! 

For the cupcakes I wanted to somehow fashion the Frosting to look like a mound of dirt on a football field topped with a little bit of Vanilla butter cream "grass" and then topped with these adorable little football's that I purchased at Party City! Yeah, I'm sort of a dork, admitting to it is half the battle, right?

As I've mentioned the Magnolia Bakery cookbook previously and expect to again in the future here is the link again to purchase the cookbook for yourself! It's truly one of my favorites and I promise if you order it you will LOVE the recipes! Unfortunately, I'm not sure why, Amazon still doesn't have it, but Overstock does at this link!

A picture of the ingredients for the cupcakes themselves is below. Pretty easy ingredients and you'll notice both AP Flour and Self-Rising Flour are used in the recipe hence eliminating the need to add salt and baking powder. SCORE!
 
I made a small batch of Vanilla Buttercream frosting - ingredients shown below. I tinted it green for the grass. In retrospect purchasing the "leaf green" gel color might have been a mistake. I had noticed a darker green was available but I thought leaf green would work. I kept having to add more and more of the gel but thank goodness, because I was using gel, the flavor of the frosting was not compromised while I was trying to get it from a very un-appealing green to a grass-looking green.
 
A photo of the green buttercream is below. I did go a bit darker on the green after this photo was taken, but at least you get the idea of the small batch. 
I obviously made a much larger batch of the Chocolate Buttercream frosting as I was making 24 cupcakes. Allow me to assure you that as long as you use the appropriate equipment (KitchenAid Mixer) for the frosting recipe  you will not be disappointed with the amount of frosting you end up with. You might even have some extra! It lightens in color and is just simply amazing when you let it whip, with the paddle attachment, in your mixer for a good 5-6 minutes! Light, Fluffy and oh so tasty.

The ingredients of the absolutely delicious Chocolate Buttercream frosting are pictured below.
The freshly baked cupcakes are cooling off and boy do they look pretty. Of course I sampled a naked cupcake for texture and flavor. One of the things I like about these cupcakes is that they are NOT overly sweet allowing you, if you wish, to core and fill them with jam or some other sort of filling if you feel so compelled and you won't have something that's so sweet that it makes your teeth literally hurt! 
Once they were cool, I frosted the cupcakes with the delicious-ness of the Chocolate Buttercream using a large Wilton star tip! Obviously I could have left them alone at this point but I forged on!
I then adorned them with a bit of Vanilla (Green Grass) Buttercream and topped them with the miniature footballs! 
Freaking adorable if I do say so myself and great for any football sort of party, not just a Super Bowl Party in my humble opinion!
The taste of them is very good, not too sweet and just the perfect amount of chocolate. A friend of mine even told me that he doesn't ordinarily like frosting and loved this frosting. Yahoo!

An individual cupcake is pictured below!
A group of them is here!
Okay, one more picture!
What's the best part of the Super Bowl this year? The fact that the New York Giants emerged victorious! I like to think that my cupcakes were partially responsible for their victory as they were made with love in the hopes of their domination! 

Until next time my friends. Perhaps I'll get adventurous and even try to make a real New York Cheesecake! We'll see!

Wednesday, November 30, 2011

Pumpkin Rolls
It's almost a religion...for me

When I first saw a pumpkin roll I thought to myself, well wait a sec, what is that crazy looking orange cake looking masterpiece on the dessert table trying to masquerade as a larger version of the Little Debbie Swiss Cake Roll? A pumpkin roll, the baker of the marvel in front of me exclaimed! A what? Yeah, I wasn't one of those kids who grew up with Yule Logs like some of my readers therefore a rolled cake that was not produced by the Little Debbie Company (Corporation?) was something that I was not at all familiar with!

Since I was first introduced to the veritable eye catching dessert that is the pumpkin roll, and all rolled cakes for that matter, I have been making a variation of the pumpkin roll for the holidays. I used to make it more times a year, but these days it's reserved for Thanksgiving. 

During the first several years of which I made the pumpkin roll it was always trial and error. Some of them came out great, while others came out pretty flat or even square and not visually appealing at all. After roughly 15 years of practice, yes I'm serious, I'd consider myself somewhat of an expert on making the pumpkin roll.

The recipe that I use is a variation of the pumpkin roll recipe found on Libby's Pumpkin website. The link to a recipe that I would recommend can be found at the following link.

A few of the things I change from the recipe found on Libby's website is, forget about 10x15 pans, I don't even know where to find a 10x15 pan. The jelly roll pans that I have are 12x17 and they are all I have ever used when making Pumpkin Rolls. Also, let's talk about cheesecloth. Do you have paper towels? Do you have some powdered sugar to sprinkle enough of to cover said paper towels? Good! Then do you don't need any fancy shmancy cheese cloth either! I also don't use nuts, I'm not much of a nut person when combined with pumpkin, but if you're into nuts - go ahead and add some!

A fairly simple recipe turns out to be incredibly beautiful with practice and practice only. I can only tell you the following; You need to spread the batter as evenly as possible on your parchment lined 12x17 jelly roll pan and for heaven's sake do not over bake it. You don't want it to crack. Also, flip it over as fast as possible straight from the oven onto the aforementioned powdered sugar covered paper towels and roll it up as tightly and as fast as you can! Let it cool. I will repeat, let it cool! If you try to spread the delicious filling/frosting while it's still warm it's not going to roll up looking pretty and let's be honest, for a dessert like this one, looking pretty is the goal. I'll tell you though, I've made pumpkin lovers out of non-pumpkin lovers with this recipe. I've had people tell me there isn't pumpkin in that - I hate pumpkin! Some people just don't have the penchant for pumpkin like I do, I suppose. 

Feast your eyes on the splendor that was this years pumpkin roll sliced up below on a dessert platter for Thanksgiving. Ordinarily I sprinkle it with powdered sugar before serving, but I just didn't think that it was necessary this year! 

Sunday, November 27, 2011

The Ultimate Brownie
The Baked Brownie

Every year, out of the many things I am responsible for at the Thanksgiving feast is the dessert selection. Some of the recipes featured on the dessert platter this year have been featured on my blog previously. Of the few that haven't, the first one I want to tell you about is the Baked Brownie. 

I found out about the Baked folks by accident when scrolling for recipes on another website. Since I found out about them, I have purchased both of their cookbooks and am eagerly anticipating their third cookbook of which they are currently working on! The cookbooks for purchase can be found here and here. I highly recommend both of them and bake out of them often. 

I am not a huge fan of Oprah Winfrey, well let's be honest, I'm not a fan of Oprah Winfrey at all! But, when I was scrolling the website of Baked some time back I found out that the Baked Brownie has been named, many times, as one of Oprahs favorite things. I guess it's been featured on one of her past programs where women's heads explode as they are made privy to what Oprah covets at that given moment. Ordinarily I wouldn't put much stock in what Oprah deems as good, but when I tell you this brownie is good - that adjective just doesn't seem to be enough to describe it. Grand would be more like it or rather, the best brownie you've ever tasted might be more appropriate. The brownie recipe I used can be found on page number 117 in the first of the Baked Cookbooks entitled Baked: New Frontiers in Baking. 

The recipe starts out with relatively simple ingredients, but it's all about the quality of chocolate and cocoa powder. The ingredients I used are displayed below. Please note that the bag of brown powder looking sinister is a bag of the greatest cocoa powder (in my opinion) which is Valrhona. When you're lucky, Central Market will carry it in their bulk section and these bags is how you buy it. It's expensive, but it is worth it! If you live outside of Dallas, several websites carry it as do several specialty markets. 
The combination of the ingredients using the double boiler method is really important. It is not necessary to purchase a pricey double boiler. A good medium sized pot with a metal bowl or pyrex bowl on top of the simmering water will work just fine. 

There aren't many other pictures to show you. The one tip that the Baked folks give in the cookbook is that an over baked brownie is not a Baked Brownie so keep a close eye on the brownies when cooking and for the love of God please do not over mix! 
I know in the picture above they look like a pyrex pan of any other brownies, but when you cut into them you will be a believer! What you end up with is a brownie that looks something like this. A welcome chocolate bite for the Thanksgiving dessert tray. 
A picture of the dessert tray is below. The orange-y loaf pictured is the Baked Pumpkin loaf that I have told you about previously on this blog. The other, well, you'll just have to wait for my next blog to read about it! 

Saturday, November 19, 2011

Testing, Testing, this is only a Test!
Pumpkin Pie - Test Recipe for Thanksgiving

Most of my readers know by now that one of my greatest fears in the dessert, but more specifically the pastry world, is the pie! Not just any pie, but the pie with the rolled crust. I have only tried to make one pie previous to this one and it is safe to say that it was a nightmare. The inside was tasty but the crust was tough and obviously had been overworked. 

Thanks to a friend I learned some new techniques for constructing a good rolled pie crust and I was EXTREMELY pleased with the result. The link for the pie crust that I used can be found at the following link - it is actually technically a pate brisee. I am not going to sit here and pretend that I actually know the difference between pie crust and pate brisee. It looked like pie crust to me, it tasted like pie crust to me. So to me, it will henceforth be referred to as pie crust. 

Below are the ingredients that I used for the pie crust. Fairly simple and straightforward. 
After mixing the pie dough in the Cuisinart Food Processor and splitting into two equally sized flat mounds of dough, wrapping in plastic wrap and chilling out in the fridge for an hour I was ready for my chance! Actually more like chomping at the bit, for my chance to test out my newly learned skills for rolling pie dough. It worked!
I had every intention of making the dough like shown in the picture in a fluted fashion but unfortunately I had forgotten the tip and cut the dough too short so I just made it pretty simple. Hey, at least it looks homemade, right?
As instructed in the recipe I pricked it all over with a fork and placed in the freezer for a bit and then "blind baked" it in the oven for a little bit with pie weights. Below is how it turned out. I had also forgotten the tip regarding pie crust shrinking when baked. Hey, I did clarify that this recipe was only a test, right?
All and all I found it to look pretty good and tasty! I began constructing my filling not realizing that the filing was meant for a deep dish pie, therefore I had some filling left over. The recipe for the filling itself can be found at the following link. Below the ingredients for the filling are pictured. 
The filling baked absolutely beautifully and the finished product was delightfully delicious! I will absolutely be making another, hopefully more visually appealing, version of this pie for Thanksgiving this week! 
A perfect slice of pie for me after cooling in the refrigerator over night. So yummy!
I highly recommend this recipe with a dollop of lightly sweetened homemade whipped cream! 

Wednesday, November 16, 2011

Granit House Rolls
Like Parker House Rolls, but better!

Parker House Rolls are something that everyone in America grew up eating at their respective dinner tables. They are just a standard yeast roll that, when you bake them, stick together so that you have to pull them apart to make them an individual roll. I've begun to see them more on Cooking Shows on TV. Just recently they were featured in a sweet/salty dish, on the finale of Top Chef Just Desserts.

The recipe for the rolls themselves comes from one of my savory cooking idols, Bobby Flay. A little over a year ago I had the opportunity to meet him. He was here in Dallas for a book tour for the 'Throwdown' book. After waiting for over two hours in line, I had the chance I had been waiting for which almost rendered me speechless. I was standing face to face with Bobby Flay. What was I going to say to him? Was he going to be nice? All of these questions rattling off in my head at a million miles per hour as I was whisked over by a staffer of the book store to have my meet and greet and get picture with THE Bobby Flay. The picture is awful (of me) with Bobby Flay looking like a statue. I'm sure that he has a standard stance for all photo ops but for me it was a dream come true to get to meet him and get my book sign. So what did I say to him? I told him that I had eaten at his restaurant (Bar Americain) in New York City a few weeks prior and that I enjoyed it as well as the fact that I was an aspiring cook myself. He grinned and nodded and said thank you. I'm sure he probably didn't even hear what I was saying, but at least he was nice! After the signing I bounded home, so excited with my new book that he personalized to me with my own name! 

Fast forward 24 hours after the book signing, we have a dog who is quite the character. Sometimes you can leave something sitting on a the coffee table and he won't bother it, other times you would think that it is his mortal enemy number one. So what was his mortal enemy number one this day? You guessed it! My newly signed Bobby Flay Cookbook personalized to me was in shreds on the floor. It was heartbreaking. I immediately e-mailed the e-mail address I found on Bobby Flays website explaining what had happened. I also sent several tweets to Bobby Flay himself hoping and praying for some sort of reply. I didn't want a new book for free, I was willing to pay for it, I just wanted a new book that was not in shreds. I wish I could tell you that I heard back from him and/or his staff but I never did. To this day, I still have the torn signature page from the book that is written to me and has Bobby's signature. Hopefully one day I'll get to meet him again and tell him the story of the book that my dog Atticus did NOT welcome into our home. 

Onto the rolls. I know I've written a lot in this blog so I'll be as straight and to the point as possible. The recipe for the rolls can be found at this link  - Why did I call them Granit House Rolls instead of Parker House Rolls? This past Saturday when I wanted to make these as a test recipe for our family Thanksgiving I realized I didn't have any whole milk in the house. What did I have? Heavy Whipping Cream - so I used that! 

Below are the ingredients for the Parker House Rolls - The milk being replaced by Heavy Whipping Cream in this case.
I'll be honest with you, the construction of the dough was rather unusual to me since I am not a seasoned bread maker. The dough when it was "done" in the mixing bowl was still incredibly sticky but I pushed on and continued to knead the dough for the 5 minutes and I don't know what magic or science happened but the crazy sticky dough became one huge ball without barely a quarter cup of flour added during the kneading process. Amazing!
The Dough took about an hour or so to rise on the first rise. I mistakenly did not take a photo of the dough after rising, only before (pictured above). 

The recipe states that it makes 24 rolls. I instead, chose to make 47, yes, 47, smaller rolls. Here they are before the second rise.
I have to say there really isn't anything like the smell of fresh bread cooking in a home, heavenly!

The rolls straight from the oven were brushed with melted butter and sprinkled with salt.
A closer look at the inside of the roll - dense and absolutely delicious without that "yeasty" taste. 
Verdict? These will absolutely be making an appearance at our Thanksgiving table this year. Well, not these exact rolls, but a new fresh batch. Hopefully those turn out just as well as these! 

Monday, November 14, 2011

Tres Leche or Cuatro Leche
You be the judge!

A friend of mine who I work with had her Birthday recently (by recently I mean in October). I promised her a cake, but due to some delays on my part the cake was slightly belated. 

Her favorite cake is Tres or Cuatro Leches cake. I chose to make Tres Leches Cake, which conversely, due to the ingredients used, could be referred to as a Cuatro Leches cake. Leche is Spanish for milk. Tres of course being Spanish for three and Cuatro being Spanish for four. The milks used in this case are whole milk (I used 2%), evaporated milk and sweetened condensed milk...topped with heavy whipping cream combined with sugar and whipped into fluffy peaks for a fresh whipped cream topping. 

The first time I tried a Leche cake was at a restaurant here in Dallas called La Duni. I haven't been there in quite a while but to tell you the honest to goodness truth the only reason I would want to go back there is for the Cuatro Leche cake. If you want to make it yourself you can certainly try. They have published the recipe at this link - I personally didn't want to make this exact cake for my friends birthday but it is certainly the inspiration. Perhaps some time I will try my hand at La Dunis famous cake. At this time however, I don't have a kitchen torch - hint hint hint for my family, friends and husband alike! The holidays ARE coming up, you know!

The recipe used for the cake can be found at the following link. I wavered between this recipe and a recipe found on the Pioneer Woman's website. I finally chose this recipe because of it's ratings. 

The ingredients for the sponge like cake are very simple - most people would have these ingredients laying around the house. The recipe recommends using a Pyrex dish to bake the cake for accurate baking time. My cake baked in just about 30 minutes using a Pyrex dish. A note is made in the recipe that if you choose to use a metal pan the cake will cook much quicker or in about half the time. 


The ingredients for the cake itself are displayed below.
I have got to say something, God bless my Kitchen Aid Mixer. I know I've talked about it before but I must say it again. Whipping the eggs for 4 minutes in a recipe like this with a hand mixer would be just boring and you would obviously have to stand there. I am a baker who is constantly on the go! With the Kitchen Aid I simply turned the mixer on high and walked away for about 4 minutes. At that point I was able to combine the flour, salt and baking powder mixture. By the time I returned to the mixer the eggs were fluffy and pale like they were supposed to be! A baker/cooks dream all in one, an appliance that does something for you hence leaving you time to work on other components of a recipe is truly irreplaceable in my humble opinion. 

While the cake was in the oven baking I got the tres leche mixture put together. Below are the 3 milks I used. 
Once the cake came out of the oven it was fluffy and perfectly spongy looking. I took out my aggression of the day and poked it all over using toothpicks and then slowly poured the delicious milky mixture over the cake and let it really soak into the cake. 

Here is a picture of the cake right after it came out of the oven.
And a picture of the cake after the tres leche mixture has been poured over it. Can't really see a difference? Neither can I, but it is there, I promise you it's there! 
At this point I went ahead and loosely covered the cake and put it in the refrigerator for a few hours to let it get not just cool, but cold so that it could be topped with the fresh whipped cream. 

The whipped cream ingredients are simply 2 cups of heavy whipping cream and 1/4 cup of sugar. I added a touch of vanilla for a little bit more complex flavor. I took care not to add too much vanilla as the color could have easily been an off putting brownish white. I don't personally believe in using clear vanilla extract. Something about that just seems wrong to me. Vanilla beans are brown - how on earth a vanilla extract that is clear could be "natural" is beyond my scope of understanding. 
Here is the cake ready to be taken to work.

Secret weapon standing by. Dulce De Leche which is a mexican caramel like topping that I could honestly eat out of the can with a spoon. 
The cake when served was topped with a slight bit of Dulce De Leche for a little bit of sweetness and difference of texture. Absolutely delicious though the Dulce De Leche straight from the can was rather thick. If I chose to make this cake in summer I would absolutely add fresh fruits to serve it which I feel would be phenomenal. This time of year though I don't really like the in-season fruit selection in the local markets. 

I have to say that the cake tasted okay the first day eaten, about 18 hours after being made. The next day, however, approximately 36 hours after being made the cake was phenomenal! I took a picture of the cake on Day one and Day two and I cannot really distinguish between them in photograph, but in taste, you definitely can! I have shown both pictures below! My surprising suggestion would be that when making this cake waiting to serve it until about 36 hours after baking/making which is rare for a cake. Usually I'm all about making a cake and serving it as fresh as possible!

Day One: 18 hours after making. 
Day Two: Roughly 36 hours after making. 
I would have to say I am pleased with how this recipe turned out and I would absolutely make it again myself and recommend to others. 

A couple of more blogs are forthcoming over the next couple of days!